When the office moved into people’s homes, ergonomics got left behind. Many remote workers now spend eight or more hours a day hunched over a laptop at a kitchen table or on a sofa, and the result has been a wave of lower-back ache, neck tension, and tired, strained eyes. The encouraging news is that you do not need a fortune or a dedicated home gym to fix this. With a handful of considered choices and a few free habits, you can build a workspace that supports your body instead of slowly wearing it down.
This guide walks through a complete home office ergonomic setup from the floor up, explaining the principles behind each choice and pointing you to deeper guides on the specific gear. Whether you are starting from scratch or fine-tuning what you already own, the goal is the same: a neutral, comfortable posture that you can hold for hours without thinking about it.
The goal: a neutral posture
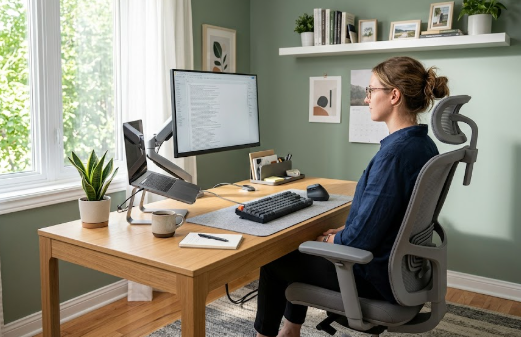
Almost every ergonomic recommendation comes back to one idea: keeping your body in a neutral posture, where your joints are supported in their natural positions and no single muscle group is forced to work overtime. In practice that means your feet flat and supported, your hips and knees at roughly right angles, your lower back gently supported in its natural inward curve, your shoulders relaxed, your forearms level, and your head balanced over your shoulders with your eyes looking slightly downward at the screen. When your setup encourages that posture by default, comfort takes care of itself. When it fights that posture, you compensate with muscle tension all day.
Start with the chair
Your chair is the foundation, because it determines the position of everything above it. A good ergonomic chair supports the natural curve of your lower back, lets you adjust seat height and depth so your feet rest flat and your knees sit just below your hips, and provides armrests that let your shoulders relax. Set the height so your elbows fall at about ninety degrees when your hands are on the desk, slide the seat depth so there is a small gap behind your knees, and position the lumbar support to fill the curve of your lower back rather than your upper back.
If you are choosing a chair, our roundup of the best ergonomic chairs for back pain covers options across every budget, and our Herman Miller Aeron vs Secretlab Titan comparison helps if you are weighing two popular favourites. If your current chair is otherwise fine but offers no lower-back support, adding one of the cushions from our best lumbar support guide is a cheap, effective fix. And if you experience tailbone or sit-bone discomfort, a seat cushion can round things out.
Get the desk height right
A desk that is too high makes you shrug your shoulders and angle your wrists upward; one that is too low makes you hunch. Ideally the desk lets your forearms rest level with your elbows at that ninety-degree angle. The most flexible solution is a height-adjustable standing desk, which lets you set the perfect seated height and also stand for part of the day. Alternating between sitting and standing is one of the most effective things a desk worker can do, because prolonged stillness, not posture alone, is what loads the lower spine.
Our guide to the best standing desks for back pain covers the leading options, and our FlexiSpot vs Uplift comparison helps you choose between the two most popular models. If you do stand, an anti-fatigue mat transforms the experience, which is why we cover the best standing desk mats separately. If you are not ready for a new desk, raising your existing surface or using a converter is a reasonable interim step.
Position your monitor at eye level
Few things cause neck and upper-back pain faster than looking down at a laptop screen all day. The top of your monitor should sit at roughly eye level, about an arm’s length away, so your head balances naturally over your shoulders rather than tipping forward. Laptop users should be especially careful: a laptop forces a compromise between screen height and keyboard height, so the best solution is to raise the laptop on a stand and use a separate keyboard and mouse, or add an external monitor.
A monitor arm or riser makes this easy and frees up desk space, and our guide to the best monitor stands for neck and back pain covers the options. Even a stack of books works in a pinch; the principle matters more than the product. If you use two monitors, place your primary screen directly in front of you and the secondary one immediately beside it, angled slightly inward.
Sort out your keyboard and mouse
With the screen at eye level, your keyboard and mouse should sit at a height that keeps your forearms level and your wrists straight, not bent up, down, or sideways. Keep them close enough that you are not reaching forward, which strains the shoulders and upper back. An external keyboard and mouse are essential for laptop users once the laptop is raised, and ergonomic designs, such as split keyboards and vertical mice, can further reduce wrist and forearm strain for people who type all day.
Our guide to the best ergonomic keyboard and mouse covers options that help keep your upper body relaxed, which indirectly protects your back by preventing the shoulder hunching that pulls posture out of line.
Support your feet and lower body
Your feet should rest flat on the floor with your thighs roughly parallel to it. If your chair is set correctly for your desk but your feet dangle, a footrest restores that supported position and takes pressure off the backs of your thighs and your lower back; our guide to the best office footrests covers good options. Avoid crossing your legs for long periods, which tilts the pelvis and twists the spine, and try to keep your weight evenly distributed whether sitting or standing.
Mind the lighting and your eyes
Ergonomics is not only about muscles and joints. Poor lighting makes you lean in toward the screen, undoing your careful posture, while glare and eye strain add to overall fatigue. Position your screen so windows are to the side rather than directly in front of or behind it to reduce glare, use adequate ambient lighting, and adjust your screen brightness to match the room. The widely recommended 20-20-20 habit helps too: every twenty minutes, look at something about twenty feet away for around twenty seconds to relax your eyes. Comfortable eyes mean you are far less likely to crane your neck forward.
Build movement into the day
No setup, however perfect, is meant to be held motionless for eight hours. The healthiest posture is your next one, so the most important habit is to move regularly: stand, stretch, or walk for a minute or two every thirty to sixty minutes. Alternating between sitting and standing, taking short walking breaks, and doing a few simple stretches keep your spine active and your circulation flowing. Our guide to back pain exercises for remote workers has quick routines you can do without leaving your desk, and if holding good posture is a struggle, a posture corrector can act as a gentle reminder while you build the habit.
Do not forget recovery
How you spend the other sixteen hours matters too. A back that is supported all day but poorly rested at night will still complain, so your mattress and sleeping posture are part of the same picture; our guide to the best mattresses for back pain covers what to look for. Gentle daily activity, staying hydrated, and managing stress all feed into how your back feels at the desk, because tension and inactivity show up as physical tightness.
A quick setup checklist
Once everything is in place, run through this mental check at your desk. Are your feet flat and supported, with knees at roughly a right angle? Is your lower back gently supported in its natural curve? Are your elbows at about ninety degrees with forearms level and wrists straight? Is the top of your screen at eye level, about an arm’s length away, with your head balanced over your shoulders rather than poking forward? Are your shoulders relaxed rather than hunched? If you can answer yes to all of these and you are getting up to move regularly, your setup is doing its job. If any answer is no, adjust that one element and check again.
Frequently asked questions
What is the most important part of an ergonomic home office?
If you had to prioritise, the chair and the monitor height give the biggest returns, because the chair sets your whole posture and a low screen is a leading cause of neck and upper-back pain. That said, the single most valuable habit, which costs nothing, is moving regularly. Even a flawless setup is not designed to be held still all day.
Can I build an ergonomic setup on a budget?
Yes. Many improvements are free or cheap: raising your laptop on books, adding a low-cost lumbar cushion, using a footrest, repositioning your screen away from glare, and simply standing up more often. You can upgrade to a better chair and an adjustable desk over time as budget allows; the principles matter more than the price tags.
Is a standing desk necessary?
It is not strictly necessary, but it is one of the most effective tools because it makes alternating between sitting and standing effortless, which counters the prolonged stillness that loads your spine. If a full electric desk is out of reach, simply taking regular standing and walking breaks delivers much of the same benefit.
How long should I sit versus stand?
There is no perfect ratio, but many people do well alternating roughly every thirty to sixty minutes rather than holding either position for hours. Start with shorter standing intervals and build up, and always prioritise comfort and movement over hitting a specific target.
The bottom line
A healthy home office is not about expensive gear; it is about arranging your space so that a neutral, comfortable posture is the default, and then moving often enough that no position becomes a problem. Start with a supportive chair and the right desk and screen height, support your feet and wrists, manage your lighting, and build regular movement into your day. Work through the linked guides for the specific pieces, set everything up using the checklist above, and your back, neck, and eyes will all thank you.
Affiliate disclosure: This article may contain affiliate links. If you buy a product through one of them, we may earn a small commission at no extra cost to you. This never influences which products we recommend.
Medical disclaimer: We are not doctors or physiotherapists, and this article is for general informational purposes only. It is not medical advice and should not replace consultation with a qualified healthcare professional. If you have persistent, severe, or worsening back pain, please seek advice from a licensed medical provider.